Make an Elmo Cake the Easy Way!
My daughter’s second birthday just passed by in a blur, but I do remember some parts – for one, we had an Elmo birthday theme party. Saying that my daughter is a fan of Elmo is an understatement – we have seven of them in the house, several videos, and lots of small figurines. She wishes she could take the huge Elmo TMX into the crib with her – we finally convinced her to snuggle with a smaller, softer Elmo her size!
For another, I made and decorated a “blushing” Elmo cake. Elmo didn’t blush on purpose – I quickly learned that you do not use red food dye to turn white icing red. (Everybody who knows color theory, quick – what color does white and red mixed together make? Yes, a gorgeous pink!)
Below, I give some tips on how to make proper red icing.
It was great fun anyway, and very easy – actually, pssst, it’s the first character cake I’ve ever made. Here’s how I made my Elmo birthday cake:
Wilton’s Elmo Cake Pan

First, I bought a cake pan in the shape of Elmo – you can buy this at Amazon. I also found it at our neighborhood bulk foods store. I bought all her party supplies at Celebrate Express.
The Wilton cake pan made a perfect image of Elmo. All I had to do afterwards is decorate it. Wilton is pretty neat, in that they have a whole line of kid’s character bake pans to choose from – Dora, rubber ducks, Disney’s Cars, Barney, teddy bears, Barbie – literally hundreds of different styles.
The only danger lies in separating the baked cake from the pan – because of the intricate shapes and figures, it is easy for the cake to stick or fall apart.
Not to worry, though! Here’s how to prepare any Wilton character cake pan:
- Solid vegetable shortening (it has to be shortening – butter or margarine will burn)
- Flour
- Pastry brush
Take the vegetable shortening (or pan vegetable oil spray, but I’ve never tried it) and grease the entire cake pan. Cover everything completely, and use a silicone pastry brush to get into all the nooks and crannies. Then take some flour (about 2 tbsp) and sprinkle inside the entire pan. Shake it to cover everything. Finally, turn the pan upside down over the sink to remove any extra flour. Check to make sure nothing of the pan is uncovered. If so, repeat with the shortening and the flour.
Baking the Cake and Removing it From the Pan
What type of cake does a two year old like? You guessed it, chocolate! I got my chocolate cake recipe here. Either that, or simply use a regular cake mix (just don’t tell anybody!)
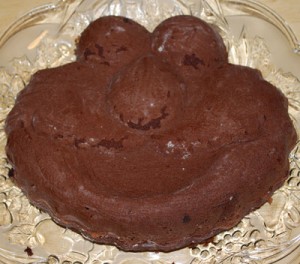 Go by your cake’s instructions, and fill the Elmo pan completely. The pan should be about half way full. Stick it in the oven according to your recipe’s instructions.
When it’s done (you can use a butter knife to check and make sure it comes out clean), let it cool on a rack for 5 minutes. Make sure you use a rack, so the heat can escape from the bottom. While it’s cooling, carefully slice off the top rounded part of the cake (this will become the bottom, and also prevents any cracks from happening.)
Take your butter knife and gently pry along the edges. Make sure nothing is sticking. Then, place a cake board or large, flat plate on top of the cake. With oven mitts, and in one smooth motion, flip the cake over. Slowly and carefully remove the cake pan. If all goes well, it’ll simply come off with nothing sticking. There will be a lot of loose flour from the cake pan coating. I would leave it. I’ll show you a tip later where the loose crumbs won’t interfere with the icing.
Let it cool for at least an hour.
Decorating Elmo
There’s several different ways to make Elmo’s face – red, black and orange icing, marshmallows for eyes, cookies. Because I’m not a big fan of food dye, I choose a combination of chocolate chips, cookies and chocolate drops – you can find them all at your local bulk foods store.
My decorating list:
Buttercream Icing:
- 1 cup soft butter or margarine (unsalted tastes better)
- 4 tbsp milk (adjust for thickness. I used a bit less.)
- 4 cups confectioners’ or powdered sugar
- 1 tsp clear vanilla extract
With an electric hand mixer, beat the butter until creamy. After a couple minutes, gradually add the sugar, using the lowest setting so the sugar doesn’t fly all over the place. Increase the speed of the mixer back to medium and add the vanilla and milk. If it’s too runny, add more sugar, and if too thick, add more milk, a teaspoon at a time.
When finished, separate the icing into one quarter part and a three quarter part. With the three quarter, make the red icing. I could leave it at that, but I found out that making red icing is one of the hardest thing to do. No matter how much food coloring I put in, the icing stayed pink. Here’s a couple tips I found out:
Tips to Make red icing
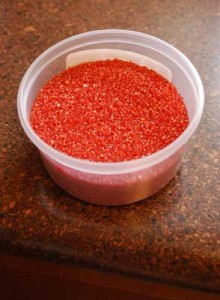 Here’s a couple suggestions I came across on various cake decorating forums – the most common techniques are these:
- Use powdered red food coloring – it’s more concentrated
- Red liquid gel instead of basic red food coloring
- 1/2 ounce red paste, a tiny amount of black paste, and one drop of purple
For all techniques, the most important is to LET IT SIT FOR A FEW HOURS, or overnight. No matter which way you do it, the color will darken the longer it sits. So, leave your mix in the refrigerator overnight.
So, what did I do? With some quick thinking, I realized I had red sprinkles left over from Valentine’s Day. Problem solved!
Elmo Decor:
Before decorating, there’s the problem of all the crumbs and loose bits on the face of the cake. Instead of brushing them off, simply place the cake in the freezer for about five minutes. Do this after it has completely cooled, else there’s the danger of it cracking. By keeping it in the freezer for a bit, you freeze the top layer of the cake, making the surface firmer. The crumbs will also stick, frozen, to the surface. This makes icing the cake a lot easier.
With the icing created, these are the various decorations I used for the cake:
- 3/4 part red icing
- 1/4 part white icing
- milk chocolate chips
- 2 large chocolate drops (about an inch in diameter)
- 1 round oatmeal cookie (about two inches in diameter. I used 1 inch – it could have been bigger.)
- With the white icing, I carefully spread it around Elmo’s eyes, nose and mouth, using a knife to make the thin parts of his smile.
- The chocolate drops I used for his eyes
- The oatmeal cookie became his nose
- I filled his mouth in with chocolate chips
- Then, with the red icing, I began decorating his face. You can use a Wilton star-shaped tip and a bag or cake decorator– I used a cake decorator that my Mom bought decades ago, so it felt like a calking gun. Being a guy, I’m more used to that, so I was a natural at this :)I first used a spatula to frost the sides. Then, with the cake decorator, I piped rows of rosettes all over the bare parts of the cake to simulate his fur. I pushed into the bottom, squeezed a bit, then twisted to create the pattern and a tail. Once you do it a few times, it becomes automatic, and you can cover his entire face in “fur” in a couple minutes.
- Finally, because the icing was actually a hot pink, not a red, I sprinkled red candy sprinkles all over his fur. Done!
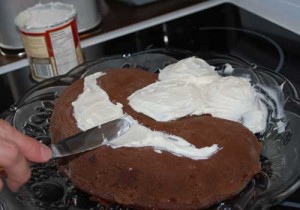
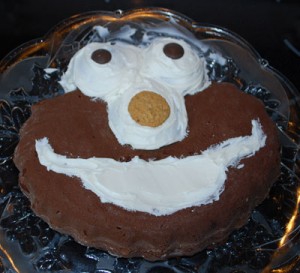
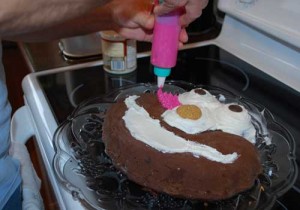
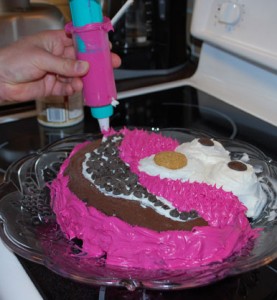
The cake was a hit, but with a two year old, anything with chocolate is awesome, so for the parents, it was a hit. Actually, my daughter loved it too, because she immediately exclaimed “EHHHH MOEEEE!” open seeing it … so, it did look like Elmo.
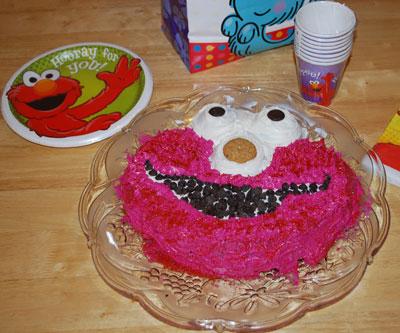
Enjoy your own Elmo birthday party! I would love to hear how you created yours, and if you send a picture, I’ll add it to the bottom of this article. Thanks!