Personalized Party Supplies are Here!
Sure, you can get banners with your child’s name, and a cake with a photo of their smiling mug, but now you can get personalized party supplies with their name and image on plates, hats, cups, favor boxes, invites, thank you cards and centerpieces!
Say your child loves the tv show Yo Gabba Gabba – your child will certainly love this theme by itself. But now, what if her smiling face was surrounded by Yo Gabba Gabba characters on all the plates and napkins? That would certainly blow her away, and impress her friends, too! Check out the difference:
 |
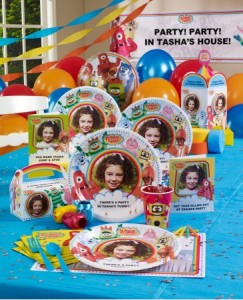 |
I can just see my daughter’s reaction now. “Loooook! It’s ME!” Instead of throwing the supplies out after her birthday, you would certainly want to keep some as a memento.
Order Your Personalized Party Supplies
To order, simply choose the party supplies you need, then scroll down and add the personalized items you would like. Once that’s done, the next step is to add a photo (you can add three different ones), which you can position on the items. Finish your order, and it’s done! Here’s a step by step guide:
1. Choose Your Party Theme and Items
First, choose your party theme and individual items. Most items come in packs of 8, so if you have 16 kids coming, choose 2, not 16!
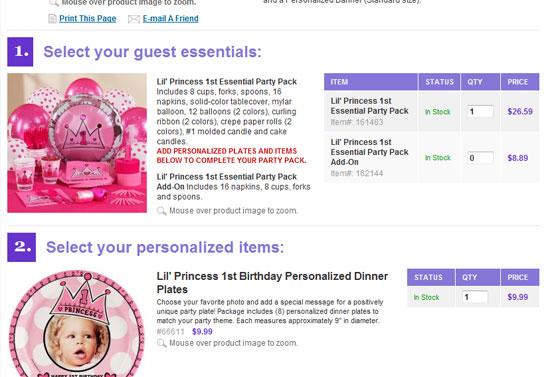
2. Click “Personalize Now”
When you’re done choosing all your items, scroll to the bottom and click “Personalize Now”
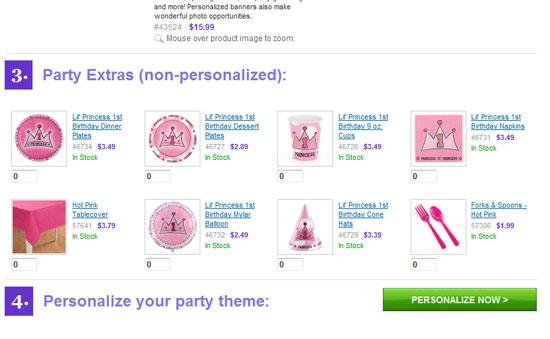
3. Upload Your Photos
In the next screen, you can upload up to 3 photos from your computer. Find cute photos of your birthday kid (hard to choose from the 3000 we took in Anna’s first year!) by clicking “Upload Photo” on the left.
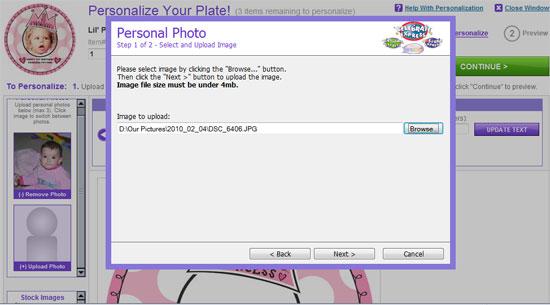
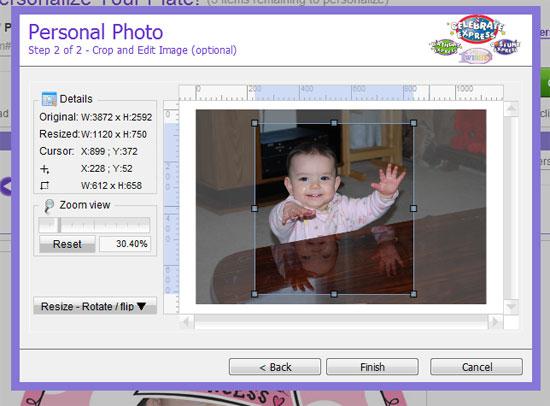
4. Modify Your Photos
Once your photo is upload (max 4MB), you can zoom in, crop and rotate your photo. Click Finish when complete.
5. Personalize Each Party Item
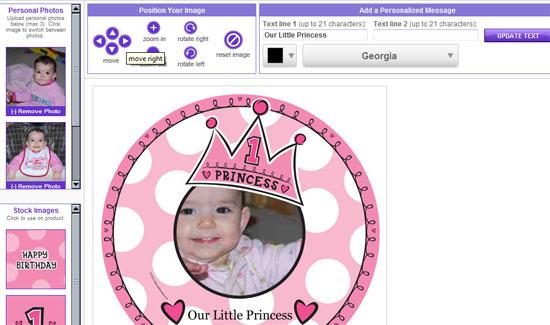
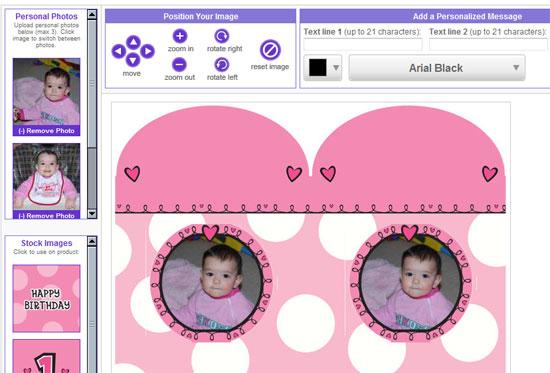
Your photo will appear on the first personalized party supply item on the list. If there is no photo, simply click one of the photos on the left. This is a bit wonker than I thought, because I’m used to cool web technologies where you can simply drag the photo with your mouse. No matter, you click the arrows to reposition the image. Zooming in and out REALLY zooms your image, so be careful with it. On this screen, you can also enter your text and font to add to the party item. Clicking font and adding your text is a two step process – you can’t update both at the same time.
6. Confirm that all is Correct
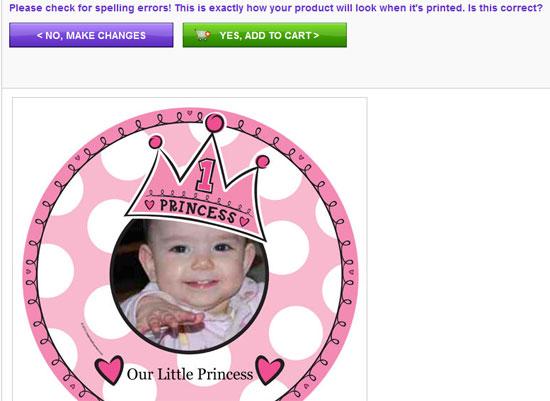
Once it’s done, click “Continue.” In the next screen, you can review what your party item will look like. Confirm that everything is correct.
7. Repeat for all Personalized Party Supplies
Do this for all your other items. Simply click one of your uploaded images on the left to import it onto your party item.
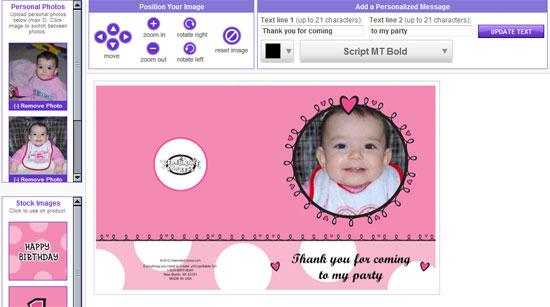
And my third item, a centerpiece.
8. Review and Finalize Your Order
Once you’re finished personalizing all your items, you can review your entire order. Select your country of destination and your shipping, and a coupon code, if you have one.
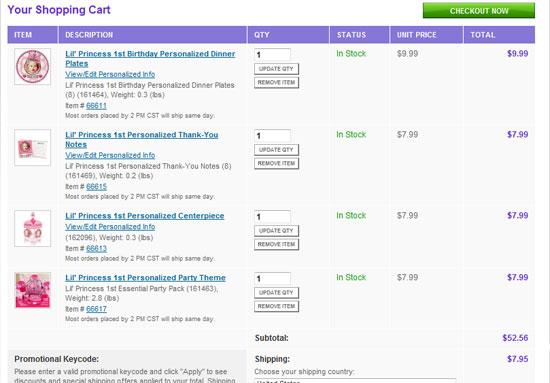
That’s it! Create an account or your shipping and credit card info, and click “Submit Order” at the bottom of the screen. Before that, you do have a chance to modify your order and shipping, so nothing is ever permanent until you actually check-out.
What are you waiting for? Well, for me, it’s still two months until my daughter’s 1st birthday, so I’ll be waiting. We plan to have a picture of her as a newborn as the centerpiece, and the other two images will be taken a few weeks before her first birthday. Whatever we decide, her cute mugshot will definitely be on everything for the party! They will also make great memorabilia to view in future years.